
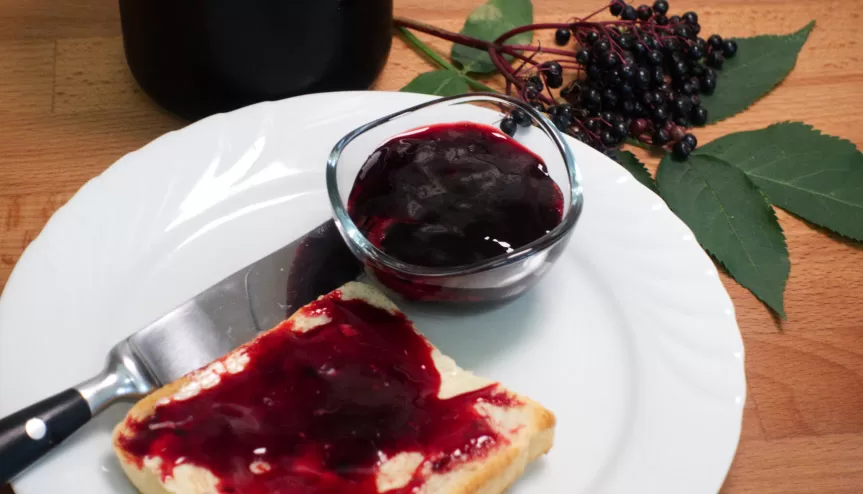
Looking to add some flavor to your morning toast? Look no further than this delicious Elderberry Jelly recipe. Made from juicy and vibrant elderberries, this homemade jelly is the perfect addition to your pantry. With its dark purple color and sweet-tart taste, elderberry jelly is not only visually appealing but also packed with health benefits.
Elderberries are rich in antioxidants, vitamins, and minerals that support immune health and promote overall well-being. Plus, they add a burst of natural sweetness, making this jelly irresistible.
Whether you’re a seasoned jelly-maker or a novice in the kitchen, you’ll find this step-by-step guide easy to follow. So why settle for store-bought jellies when you can make your own, bursting with the fresh flavors of elderberries?
Get ready to impress your family and friends with this delightful homemade elderberry jelly. Let’s dive right in and whip up a batch of this delectable spread!
Health Benefits of Elderberries
Elderberries, the star ingredient of this jelly, have been used for centuries for their medicinal properties. These small, purple-black berries are packed with antioxidants, vitamins, and minerals that can boost your immune system and improve your overall health.

Elderberry might exert favorable impacts on certain indicators of heart and blood vessel well-being.
Elderberries are known for their high levels of vitamin C, which can help strengthen the immune system and protect against common infections. They also contain flavonoids, which have been shown to have anti-inflammatory and antioxidant effects.
In addition to their immune-boosting properties, elderberries are rich in fiber, which aids in digestion and helps maintain a healthy gut. They are also a good source of potassium, which plays a crucial role in maintaining heart health and regulating blood pressure. Elderberries have even been studied for their potential anti-cancer properties, as they contain compounds that may help inhibit the growth of cancer cells.
Gather and Prepare Elderberries
Before you can start making your elderberry jelly, you’ll need to gather and prepare the elderberries. Elderberries are typically harvested in late summer or early fall when they are plump and ripe. Look for clusters of dark purple berries on elderberry bushes, making sure to avoid any green or unripe berries.
Once you’ve gathered your elderberries, it’s important to remove the stems and any leaves or debris. Rinse the berries thoroughly under cold water to remove any dirt or insects. You can use a colander or a fine-mesh sieve to make this process easier. After rinsing, gently pat the berries dry with a clean towel.
Step-by-Step Guide to Making Elderberry Jelly
Now that you have your prepared elderberries, it’s time to dive into the step-by-step process of making elderberry jelly. Follow these instructions carefully for the best results:
-
Measure out the elderberries: Start by measuring out 4 cups of prepared elderberries. You may need to adjust the quantity depending on the size of your berries.
-
Prepare the canning jars: Sterilize your canning jars and lids by boiling them in a large pot of water for 10 minutes. Remove them from the water and let them air dry.
-
Cook the elderberries: In a large pot, combine the elderberries with 1 cup of water. Bring the mixture to a simmer over medium heat and let it cook for about 15 minutes, or until the berries are soft and mushy.
-
Strain the mixture: Place a fine-mesh sieve or a cheesecloth-lined colander over a large bowl. Pour the cooked elderberries into the sieve or colander, using a spoon to press out as much juice as possible. Discard the solids.
-
Measure the juice: Measure the juice you obtained from the cooked elderberries. You should have about 3 cups of juice. If you have less, add some water to make up the difference. If you have more, you can either discard the excess or adjust the other ingredients accordingly.
-
Prepare the pectin mixture: In a separate bowl, mix together 1/4 cup of pectin and 1/4 cup of sugar. Set aside.
-
Cook the jelly: In the same pot used to cook the elderberries, combine the elderberry juice, pectin mixture, and the remaining sugar (about 4 cups). Stir well to dissolve the sugar and pectin. Bring the mixture to a rolling boil over high heat, stirring constantly.
-
Skim off any foam: As the jelly boils, a foam may form on the surface. Use a spoon or a skimmer to skim off the foam and discard it.
-
Test for doneness: To test if the jelly is ready, place a small amount on a chilled plate and let it cool for a few seconds. If it wrinkles when you push it with your finger, it's done. If not, continue boiling for another minute and test again.
-
Fill the jars: Once the jelly is ready, carefully ladle it into the sterilized canning jars, leaving about 1/4 inch of headspace at the top. Wipe the rims clean with a damp cloth, then place the lids on the jars and screw on the bands.
-
Process the jars: Place the filled jars in a boiling water canner, making sure they are fully submerged. Process the jars for 10 minutes, then remove them from the canner and let them cool on a towel-lined countertop.
-
Seal and store: After the jars have cooled, check for proper seals by pressing down on the center of each lid. If the lid doesn't move or make a popping sound, it's sealed. Store the sealed jars in a cool, dark place for up to a year.
Tips and Tricks for Perfect Elderberry Jelly
To ensure your elderberry jelly turns out perfectly every time, keep these tips and tricks in mind:
-
Use ripe elderberries: Make sure your elderberries are fully ripe before using them to make jelly. Unripe berries may not have enough natural pectin, resulting in a jelly that won't set properly.
-
Adjust sugar levels: The amount of sugar needed may vary depending on the sweetness of your elderberries. Taste the juice before adding sugar and adjust accordingly. You can also reduce the sugar if you prefer a less sweet jelly.
-
Use fresh lemon juice: Adding a splash of fresh lemon juice to the jelly mixture can help enhance the natural flavors of the elderberries and balance the sweetness.
-
Don't overcook the berries: Be careful not to overcook the elderberries, as this can result in a jelly with a slightly bitter taste. Cook them just until they are soft and mushy.
-
Skim off foam: Removing the foam that forms on the surface of the jelly during boiling will result in a clearer, more visually appealing jelly.
Storing and Preserving Elderberry Jelly
Proper storage is key to preserving the freshness and flavor of your elderberry jelly. Follow these guidelines to ensure your jelly stays delicious:
-
Sealing the jars: After filling the jars with the hot jelly mixture, make sure the lids are tightly sealed. The sealing process is crucial for preventing spoilage and maintaining the jelly's shelf life.
-
Cool and check for seals: Allow the jars to cool completely before checking for proper seals. Press down on the center of each lid to ensure it is firmly sealed. If a lid pops or moves, it is not properly sealed and should be refrigerated and consumed within a few weeks.
-
Store in a cool, dark place: Properly sealed and cooled jars of elderberry jelly can be stored in a cool, dark pantry or cupboard for up to a year. Avoid storing the jars in direct sunlight or in warm areas, as heat can cause the jelly to spoil or lose its quality.
Serving Suggestions and Pairings
Elderberry jelly is versatile and can be enjoyed in various ways. Here are some serving suggestions and pairings to enhance your culinary experience:
-
Breakfast delight: Spread a generous amount of elderberry jelly on your morning toast or bagel for a burst of fruity sweetness.
-
Cheese pairing: Serve elderberry jelly alongside a cheese board for a delightful combination of sweet and savory flavors. It pairs particularly well with mild and creamy cheeses like brie or goat cheese.
-
Dessert topping: Drizzle elderberry jelly over pancakes, waffles, or ice cream for a decadent and fruity twist.
-
Glaze for meats: Use elderberry jelly as a glaze for roasted meats like pork or chicken. The sweet and tangy flavors of the jelly will complement the savory meat beautifully.
Variations and Alternative Recipes
While this recipe for elderberry jelly is delicious on its own, you can also get creative and try different variations or alternative recipes. Here are a few ideas to inspire you:
-
Elderberry and ginger jelly: Add a touch of fresh ginger to the jelly mixture for a subtle, warming flavor that pairs well with the elderberries.
-
Elderberry and lavender jelly: Infuse the elderberry juice with dried lavender flowers for a unique and fragrant twist on traditional elderberry jelly.
-
Elderberry and apple jelly: Combine elderberries with apples to create a flavorful jelly that balances the sweetness of the apples with the tartness of the elderberries.
Frequently Asked Questions About Elderberry Jelly
Q: Can I use frozen elderberries to make jelly? Yes, frozen elderberries can be used to make jelly. Simply thaw them before starting the recipe.

Q: Can I use dried elderberries instead of fresh ones? Dried elderberries can be used, but they may require longer cooking time and more water to rehydrate them before straining.

Q: Can I substitute pectin with gelatin? Gelatin is not a suitable substitute for pectin in this recipe, as it will not provide the desired jelly consistency.

Q: Can I reduce the sugar in the recipe? Yes, you can reduce the sugar in the recipe to suit your taste. However, keep in mind that sugar acts as a preservative and helps the jelly set properly.
Conclusion and Final Thoughts
Making your elderberry jelly is a rewarding and delicious endeavor. With its vibrant color, sweet-tart taste, and numerous health benefits, elderberry jelly is a delightful addition to any pantry. By following this step-by-step guide, you’ll be able to create your very own homemade elderberry jelly that is sure to impress.
From breakfast toast to cheese pairings and dessert toppings, there are endless ways to enjoy this versatile jelly. So why not give it a try and elevate your culinary creations with the fresh flavors of elderberries? Happy jelly-making!
Related searches:
This fruit is your new skincare superhero
Why you need this superfood to your diet today