
Are you tired of store-bought granola bars that are packed with unnecessary additives and preservatives? Look no further! In this article, we will show you how to make your homemade granola bars that are not only delicious but also healthier and more nutritious.
Whether you love the classic combination of oats, nuts, and dried fruits, or you prefer to get creative with chocolate chips or peanut butter, the options are endless.
Not only are homemade granola bars a great on-the-go snack, but they can also be customized to accommodate dietary restrictions or food allergies. Gluten-free, dairy-free, or vegan? No problem! You can easily swap out ingredients to suit your needs.
So why settle for store-bought when you can whip up a batch of homemade granola bars that are tastier, healthier, and more cost-effective? Get ready to indulge in a satisfying snack that will keep you energized throughout the day. Let’s dive in and discover the art of making homemade granola bars!
Benefits of making homemade granola bars
When it comes to homemade granola bars, the benefits are abundant. Firstly, you have complete control over the ingredients that go into your bars. No more worrying about hidden sugars or artificial flavors. You can choose high-quality, organic ingredients that are wholesome and nourishing.
Secondly, homemade granola bars are cost-effective. Store-bought options can be expensive, especially if you’re buying them regularly. By making your own, you can save money in the long run and have greater control over your snack budget.
Lastly, homemade granola bars are customizable. You can experiment with different flavors, textures, and add-ins to create a bar that suits your taste preferences. From crunchy to chewy, sweet to savory, the possibilities are endless.
Common ingredients used in homemade granola bars
Before we dive into the step-by-step guide, let’s take a look at the common ingredients used in homemade granola bars. These ingredients form the base of the bars and provide the necessary structure and flavor.
- Oats: Rolled oats are the staple ingredient in granola bars. They provide texture, fiber, and a nutty flavor.
- Nuts and Seeds: Almonds, walnuts, cashews, and sunflower seeds are popular choices. They add crunch and healthy fats to the bars.
- Sweeteners: Natural sweeteners like honey, maple syrup, and agave nectar are commonly used to bind the ingredients together and add sweetness.
- Dried Fruits: dates, aisins, cranberries and apricots are great options for adding chewiness to granola bars.
- Nut Butters: Peanut butter, almond butter, and cashew butter are often used as a binding agent and to enhance the flavor of the bars.
- Flavorings: Vanilla extract, cinnamon, and cocoa powder can be added to elevate the taste of the bars.
Now that you’re familiar with the key ingredients, let’s move on to the step-by-step guide on how to make homemade granola bars.
Full guide on how to make homemade granola bars
Making homemade granola bars is easier than you might think. With just a few simple steps, you’ll have a batch of delicious bars ready to enjoy.
Step 1: Gather your ingredients – Start by gathering all the ingredients you’ll need for your granola bars. This includes oats, nuts, seeds, sweeteners, dried fruits, nut butter, and any additional flavorings or add-ins you desire.
Step 2: Prepare your mix-ins – If you’re using whole nuts or seeds, chop them into smaller pieces to ensure they are evenly distributed throughout the bars. Chop any large dried fruits into smaller bite-sized pieces as well.
Step 3: Combine dry ingredients – In a large mixing bowl, combine the oats, chopped nuts, seeds, and dried fruits. Mix them until they are evenly distributed.
Step 4: Prepare the wet ingredients – In a separate microwave-safe bowl, heat the nut butter and sweetener until they are melted and well combined. This can be done in short bursts in the microwave or on the stovetop.
Step 5: Mix wet and dry ingredients – Pour the melted nut butter and sweetener mixture over the dry ingredients.
Step 6: Press mixture into a pan – Line a baking dish or pan with parchment paper and transfer the granola mixture into it. Use a spatula or your hands to press the mixture firmly and evenly into the pan.
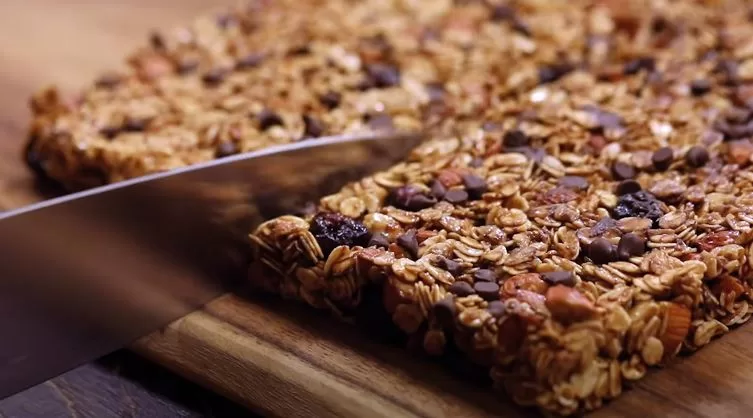
Step 7: Chill and cut into bars – Place the pan in the refrigerator for at least 2 hours or until the bars are firm. Once chilled, remove the mixture from the pan and cut it into bars of your desired size and shape.
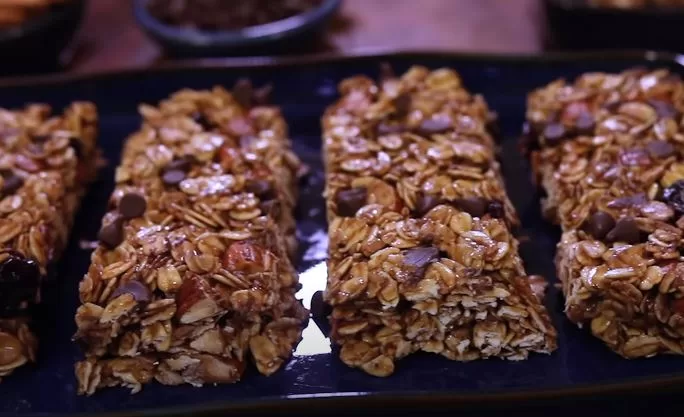
Congratulations! You’ve successfully made your own homemade granola bars. Now it’s time to get creative and add your own personal touch with different flavors and add-ins.
Tips for customizing your homemade granola bars
One of the best things about homemade granola bars is their versatility. Here are some tips for customizing your bars with different flavors and add-ins:
- Chocolate lovers: Add chocolate chips, cocoa powder, or drizzle melted chocolate on top of your bars for a decadent twist.
- Fruit fanatics: Experiment with different dried fruits like cherries, blueberries, or mango for a burst of natural sweetness.
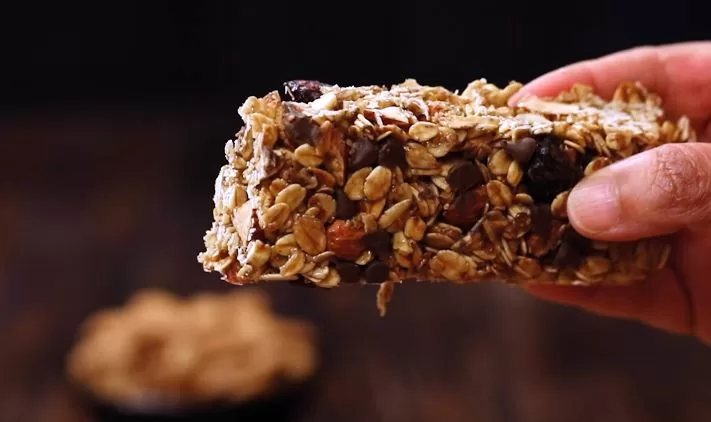
- Nutty goodness: Mix in a variety of nuts and seeds for added crunch and a boost of healthy fats.
- Spice it up: Add spices like cinnamon, nutmeg, or ginger for a warm and cozy flavor.
- Protein power: Incorporate protein powder, chia seeds, or flaxseeds for an extra nutritional boost.
Remember to adjust the quantities of the ingredients accordingly when customizing your bars to ensure they hold together properly.
Storing and preserving
To keep your homemade granola bars fresh and delicious, proper storage is key. Follow these tips to ensure your bars stay chewy and flavorful:
- Airtight container: Store your bars in an airtight container or resealable bag to prevent them from becoming stale.
- Refrigeration or freezing: If you live in a hot and humid climate, it’s best to store your bars in the refrigerator or freezer to maintain their texture and prevent them from spoiling.
- Individually wrap: If you plan to take your bars on the go, consider individually wrapping them in parchment paper or plastic wrap for easy snacking.
By following these storage tips, your homemade granola bars can stay fresh for up to two weeks in the refrigerator or several months in the freezer.
Health benefits of granola bars
When it comes to nutrition, homemade granola bars have several advantages over store-bought options. Let us find out a few reasons:
- No preservatives or additives: Homemade granola bars are free from unnecessary preservatives and additives commonly found in store-bought bars.
- Lower sugar content: Many store-bought granola bars are loaded with added sugars. By making your own, you can reduce or eliminate added sugars altogether and rely on natural sweeteners like honey or maple syrup.
- High-quality ingredients: When you make your own granola bars, you can choose high-quality ingredients such as organic oats, nuts, and dried fruits. This ensures you’re getting the best possible nutrients from your snack.
- Customizable for dietary restrictions: Homemade granola bars can easily be customized to accommodate dietary restrictions or food allergies. Whether you’re gluten-free, dairy-free, or vegan, you can substitute ingredients to suit your needs.
By opting for homemade granola bars, you can enjoy a snack that is not only delicious but also better for your overall health and well-being.
Granola bar recipes for different dietary preferences
Now that you have a basic understanding of how to make homemade granola bars, let’s explore some recipes that cater to different dietary preferences. Whether you’re vegan, gluten-free, or looking for a nut-free option, there’s a recipe for everyone.
Vegan
Ingredients: – 2 cups rolled oats – 1 cup chopped nuts (almonds, walnuts, or cashews) – 1 cup dried fruits (raisins, cranberries, or dates) – 1/2 cup nut butter (peanut butter, almond butter, or cashew butter) – 1/4 cup maple syrup or agave nectar – 1 tsp vanilla extract – Pinch of salt
Instructions: 1. Follow the step-by-step guide mentioned earlier, substituting honey with maple syrup or agave nectar and ensuring that all other ingredients are vegan-friendly.
Gluten-Free
Ingredients: – 2 cups gluten-free oats – 1 cup chopped nuts (almonds, walnuts, or pecans) – 1 cup dried fruits (cranberries, apricots, or cherries) – 1/2 cup nut butter (peanut butter, almond butter, or sunflower seed butter) – 1/4 cup honey or maple syrup – 1 tsp vanilla extract – Pinch of salt
Instructions: 1. Follow the step-by-step guide mentioned earlier, ensuring that all ingredients are certified gluten-free.
Nut-Free
Ingredients: – 2 cups rolled oats – 1 cup SunButter or other seed butter – 1/2 cup honey or maple syrup – 1 cup dried fruits (raisins, cranberries, or dates) – 1/4 cup pumpkin seeds – 1/4 cup sunflower seeds – 1 tsp vanilla extract – Pinch of salt
Instructions: 1. Follow the step-by-step guide mentioned earlier, substituting nut butter with seed butter and ensuring that all other ingredients are nut-free.
Feel free to experiment with different flavors and add-ins to create your own unique granola bar recipes that cater to your specific dietary preferences.
Packaging and presenting
Homemade granola bars make a thoughtful and delicious gift for family and friends. Here are some ideas for packaging and presenting your bars:
- Mason jars: Layer the ingredients in a mason jar, add a decorative label, and include instructions on how to make the bars. This creates a beautiful and personalized gift.
- Gift bags or boxes: Place your homemade granola bars in a gift bag or box, tie it with a colorful ribbon, and add a personalized note. This is a simple yet stylish way to present your bars.
- Snack-sized bags: If you’re making granola bars for on-the-go snacking, consider packaging them in individual snack-sized bags. This makes it easy to grab a bar and take it with you wherever you go.
Remember to label your bars with the ingredients used and any dietary restrictions they cater to, especially if you’re gifting them to someone with specific dietary needs.
Conclusion
In conclusion, homemade granola bars are a healthier, tastier, and more cost-effective alternative to store-bought options. By making your own, you have control over the ingredients, and customization options, and can cater to various dietary preferences.
Whether you’re a fan of classic flavors or enjoy experimenting with different add-ins, homemade granola bars offer endless possibilities. They are a versatile and nutritious snack that can be enjoyed at any time of the day.
So, why settle for store-bought when you can create your own delicious and wholesome granola bars? Get creative, experiment with flavors, and enjoy the satisfaction of knowing exactly what you’re putting into your body. Happy granola bar making!
FAQs about homemade granola bars
Q: How long do homemade granola bars last? A: Homemade granola bars can typically last for up to 1-2 weeks when stored in an airtight container at room temperature. You can also extend their shelf life by storing them in the refrigerator for a few weeks or in the freezer for several months.
Q: Can I customize homemade granola bars to fit my dietary preferences? A: Absolutely! One of the great things about homemade granola bars is their versatility. You can easily customize them to accommodate various dietary preferences and restrictions, such as gluten-free, vegan, nut-free, or low-sugar options. Experiment with different ingredients and substitutions to create bars that suit your needs.
Q: How do I prevent my homemade granola bars from crumbling? A: To prevent homemade granola bars from crumbling, make sure to press the mixture firmly into the baking dish before baking. You can also add a binding agent such as honey, maple syrup, nut butter, or mashed banana to help hold the ingredients together. Additionally, allowing the bars to cool completely before cutting them into individual servings can help maintain their shape.
Q: Can I make homemade granola bars without using an oven? A: Yes! There are many no-bake recipes available for homemade granola bars that don’t require an oven. These recipes typically involve mixing the ingredients and then chilling the mixture in the refrigerator until firm. No-bake granola bars are a convenient option for hot summer days or for those who prefer not to use an oven.
Q: Are homemade granola bars healthier than store-bought ones? A: It depends on the ingredients used in both homemade and store-bought granola bars. Making your granola bars allows you to control the quality and quantity of ingredients, such as reducing added sugars and using whole grains and nuts. However, some store-bought options may also be healthy depending on their ingredient list. Be sure to read the labels and choose options with minimal added sugars and wholesome ingredients.
You may also like: